Showing posts with label dessert. Show all posts

Sunday, October 20, 2013

Mini S'mores


Did you know in my real non-internet life that I'm a teacher? Yes, it's true. Some of you have been reading this blog since I was still in school getting a teaching degree, inspired by this kid to do so. Besides cooking and eating, I also have a real passion for working with people with disabilities, which is why I teach special education.

This year I have five wonderfully diverse students and three educational assistants who keep me on my teaching toes. I don't talk about teaching much because this blog has actually become my escape from it, but you should know that I have a very real love/hate relationship with my job.

I love laughing everyday at work. I love kids. I love watching kids grow and learn. I love discovering their talents and skills. I love the other teachers I work with, they work so much harder than I could ever hope to. I love exposing other people to the fact that people with disabilities have just as much to offer as anyone else.

I hate paperwork. I hate having to watch my back every second of the day. I hate being told what to do by every adult who comes in my class (I do what I want, jeez!). I hate feeling like a marginal teacher because I teach special ed (can you imagine how the kids feel?). I hate enforcing stupid rules.

Is it getting too real here? I know I write with a lot of pronouns when I get all excited, so excuse me for that.

What I really want to share with you today is this fun recipe for mini s'mores that I did at school with my class. This recipe is really more of an activity to be shared with kids, friends, students, grandparents or whoever might be interested in miniature things. The reason I bring this up is because they do get pretty sticky and don't do well in a bag or bowl because they just clump together. Originally I was thinking of giving them out as goodie bags or gifts, but don't do that, it just turns into a mess.

Instead, find some time with your loved ones and just enjoy making these mini s'mores, it's a hoot and kids go crazy for them.


Mini S'mores
Makes as many as you want to eat!

Golden Grahams cereal
chocolate chips
mini marshmallows

Ingredient amounts are not listed because you'll decide how many to make.

Lay a single layer of Golden Grahams on a plate, giving each piece about 1/2 inch of room. Try to choose the unbroken pieces, it just looks nicer. Place a chocolate chip on each piece of cereal. Microwave for 10 seconds or until chocolate is a little melty. Microwaves vary so much, so keep a close eye it.

Now place a mini marshmallow on top in each chocolate chip, taking care to press down a little so the marshmallow will stick to the chocolate. Microwave for another 10 seconds or until the marshmallows are melty.

Top each s'mores with another Golden Graham and you have yourself a mini s'more.

Once again, I tried to store these so that I could give them away as gifts but it was a no-go because they just stick together. I also tried making them in the oven which also didn't work because of the super quick cook times. Just have fun with these minis and eat them right away!


Saturday, September 28, 2013

S'more Bites


Let's talk about opposites. Sometimes all I eat are vegetables from the farmer's market and garden and sometimes I can't resist a SPAM musubi or poke bowls with fish from Lord-knows-where. You might catch me making my own yogurt or pasta, but you'll never find me making my own mustard or nutella, because ain't nobody got time for that. Sometimes I make you a healthy coleslaw and sometimes s'mores are just on my brain. I hope you don't mind.

Seriously, I try not to keep sweets in the house because it'll be stuffed in my face faster than you can say high fructose corn syrup. My name is Gwen and I'm addicted to sugar. So I hope you understand that while I tempt you with the cutest marshmallow treats ever, I totally want you to eat your vegetables, too.


S'more Bites
serves as many as you want to make!

1 bag marshmallows
2 cups chocolate chips
4 graham crackers

Melt the chocolate chips in a bowl in the microwave, stirring every 30 seconds until chips are melted and smooth.

Place graham crackers in a ziplock plastic bag, seal and crush crackers into a fine meal, a little smaller than the size of rice kernels. Place crushed crackers on a plate.

Dip marshmallows, one at a time, in the melted chocolate and then in the crushed graham crackers. Allow to cool on a drying rack. Serve as a dessert, party favor, holiday treat or snack. Great recipe for kids to make. Enjoy!


Sunday, August 25, 2013

Cream of the Crop: Kona Coffee and Dessert Tasting

Kona Rising Coffee Co. offering up their excellent cold brew

Where can you taste all the very best Kona coffee the island has to offer and work on a sugar high at the same time? At the Cream of the Crop event held every August at the Four Seasons Hualalai of course.

Elite Kona coffee farmers and roasters face off in cupping competitions to see who has the best cup of joe in categories such as organic and estate grown coffees. There is also an amateur and professional Kona coffee dessert competition. Winners will be announced soon, check back here. Entrance, parking and coffee and dessert tastings are all free to the public.

Although it can get very hot at this event, the outdoor venue offers plenty of shade and the ever mindful Four Seasons supplies ice cold water for all. Live music plays in the background and a it's only a short stroll to admire the shoreline or enjoy one of the resort's restaurants. In addition to coffee and desserts, there are plenty of other vendors offering locally made products such as art and clothing.

Coffee highlights came from Kona Rising Coffee Co. and Buddha's Cup. Good luck to all. If you missed the event this year, mark your calendar for next August.


Sunday, May 5, 2013

Ka'u Coffee Festival Triple C Recipe Contest


What do you get when you mix a lot of butter, a little sugar, and some of the world's best coffee together over scorching heat? Sugar splash burns on your belly from cooking in a swim suit?

No! I mean yes, but more importantly you get the grand prize winning recipe at the Ka'u Coffee Festival's Triple C Recipe Contest. I'm super excited to report to you all that my Coco Mocha Roca won first place candy and the overall best recipe prizes last weekend in Pahala.

You may remember that my Ka'u Coffee Brigadeiros won first place candy last year, but were edged out of the grand prize by Chelsea Lynn Kauionalani Rosario with her biscotti recipe. 


The Triple C Recipe Contest is only one part of the Ka'u Coffee Festival which is going on through May 5, 2013. I went to the ho'olaulea in Pahala on Saturday for unlimited coffee tastings, ono food, and of course great, live music. More on that event later.

If you have never been, or it has been awhile since you visited Ka'u, this is the perfect opportunity to check it out. Not only does this district of the Big Island offer views for days of the greenest ranch land and the bluest seas, but it's hard to beat the down-home, country vibe that oozes around every bend in the road. 


Before attempting to make the recipe below, you will definitely need a candy thermometer. Hope you like it!


Coco Mocha Roca
makes about 30 two inch pieces


1 cup Hawaiian cane sugar
1 cup butter, plus more greasing pan
3 TBL finely ground Ka’u coffee, divided

1 ½ cups roasted & salted Big Island macadamia nuts, chopped and divided
1 cup chocolate chips

1 cup shredded coconut

Butter a 9x11 pan.

In a saucepan over medium high heat melt sugar, butter, and 2 TBL Ka’u coffee grounds and bring to a boil, stirring constantly. Turn heat down to medium, stirring constantly for about 12 minutes or until a candy thermometer reads 300 degrees. Do not allow it to go ever 320 degrees.

Mix 1 cup of mac nuts in with sugar mixture.  Carefully spread mixture in pan with a wooden spoon, taking care to spread as evenly as possible. You may need 2 spoons to accomplish this since it is so hot. 

Sprinkle the chocolate chips and the remaining Ka’u coffee over all. Allow chocolate to melt for a minute or so, then spread it out evenly with the wooden spoon. Top with remaining mac nuts and coconut, pressing down a little so it sticks to the chocolate. Allow to cool completely before cutting into 2 inch squares with a sharp knife. Enjoy!

PS: If it is a very humid day, the sugar/butter part of this recipe may not set, so choose your day wisely. 


Sunday, April 21, 2013

Pineapple Upside Down Cupcakes


Ladies and gentlemen I have officially completed my first catering gig. Thanks to a friend from work who knows I'm kind of into cooking, I busted out 6 dozen pineapple upside down cupcakes and 12 dozen Kona coffee brigadeiros for a wedding. Phew! This was a lot of work for my tiny kitchen. Good news is, I'd do it again in a heartbeat. Need some goodies for an event? Shoot me an email: gwenedwards82@gmail.com

In the meantime, wow the crowd with these precious little cupcakes. Recipe below.


Pineapple Upside Down Cupcakes
adapted from Betty Crocker
makes 12

For cake:
1 1/4 cup flour
1 cup sugar
1 1/2 tsp baking powder
1/2 tsp salt
1/4 cup milk
1/3 cup butter
1 egg
1 tsp vanilla

For topping:
1/4 cup butter
1/2 cup packed brown sugar
6 pineapple slices, fresh or canned
6 maraschino cherries

Preheat oven to 350. To prepare the batter for the cake, measure all ingredients into a large bowl. Blend 30 seconds on low, scraping bowl constantly. Beat on high for 3 minutes, scraping occasionally. 

To prepare topping, cut the 1/4 cup butter into 12 equal pieces, placing each one into a cupcake tin. Place cupcake pan in oven for a minute or until butter melts. Sprinkle brown sugar into each tin (about 1 tsp in each) and top with a piece of pineapple and 1/2 maraschino cherry. You will need to cut the pineapple to fit, in whatever shape you like. You only want one layer of fruit. 

Spoon cake batter over topping in each tin and bake for 20-25 minutes or until a toothpick inserted in the center comes out clean. Invert onto a baking sheet, leaving the pan over the cakes for a few minutes. This gives the topping a chance to stick to the cake. Enjoy!


Sunday, March 24, 2013

Original Hawaiian Chocolate Factory Tour

Cocoa beans drying in the sun

The Original Hawaiian Chocolate Factory is one of only a handful of places in the United States where chocolate goes from bean to bar. In fact, it was the very first. And right here on the Big Island, no less.

The Coopers bought the small farm in 1997, with about 1 acre of already established cacao trees. Not knowing exactly what they had, the cocoa beans were tested and revealed to be of both the forestero and criollo varieties, ideal for making high-quality chocolate.

Which is exactly what they did. Today, the Coopers sell their single-bean chocolate (a rarity in the chocolate world) all over Hawaii in addition to offering tours of their farm.

Mr. Cooper, owner of OHCF, wows the crowd with raw cocoa peans straight from the pod 
Come on a tour and you'll be treated to the smell of cocoa beans drying on racks in the sun and a glimpse of the otherworldly manner in which cacao pods grow straight out of the trunks of their mother trees. Cooper likens the cacao harvest to an "Easter egg hunt," as the ripe pods come in various bright hues such as magenta, yellow, and orange. The pods are then split open to reveal slimy white beans that  self-ferment in wooden crates until they shed their outer coating. The beans are then dried, cleaned, roasted, winnowed (to remove the hard, outer shell), conched (the process of adding soy lecithin and vanilla powder), and tempered to become chocolate. Witnessing this involved process brings chocolate appreciation to a whole new level and is highly recommended.

Freshly picked ripe cacao pods

Tours can be had at their farm in Keauhou on Wednesday and Fridays at 9am for only $15. Be sure to book ahead, these tours sell out fast. More info: http://ohcf.us/tour/

This farm tour was part of the 2013 Big Island Chocolate Festival.


Sunday, March 10, 2013

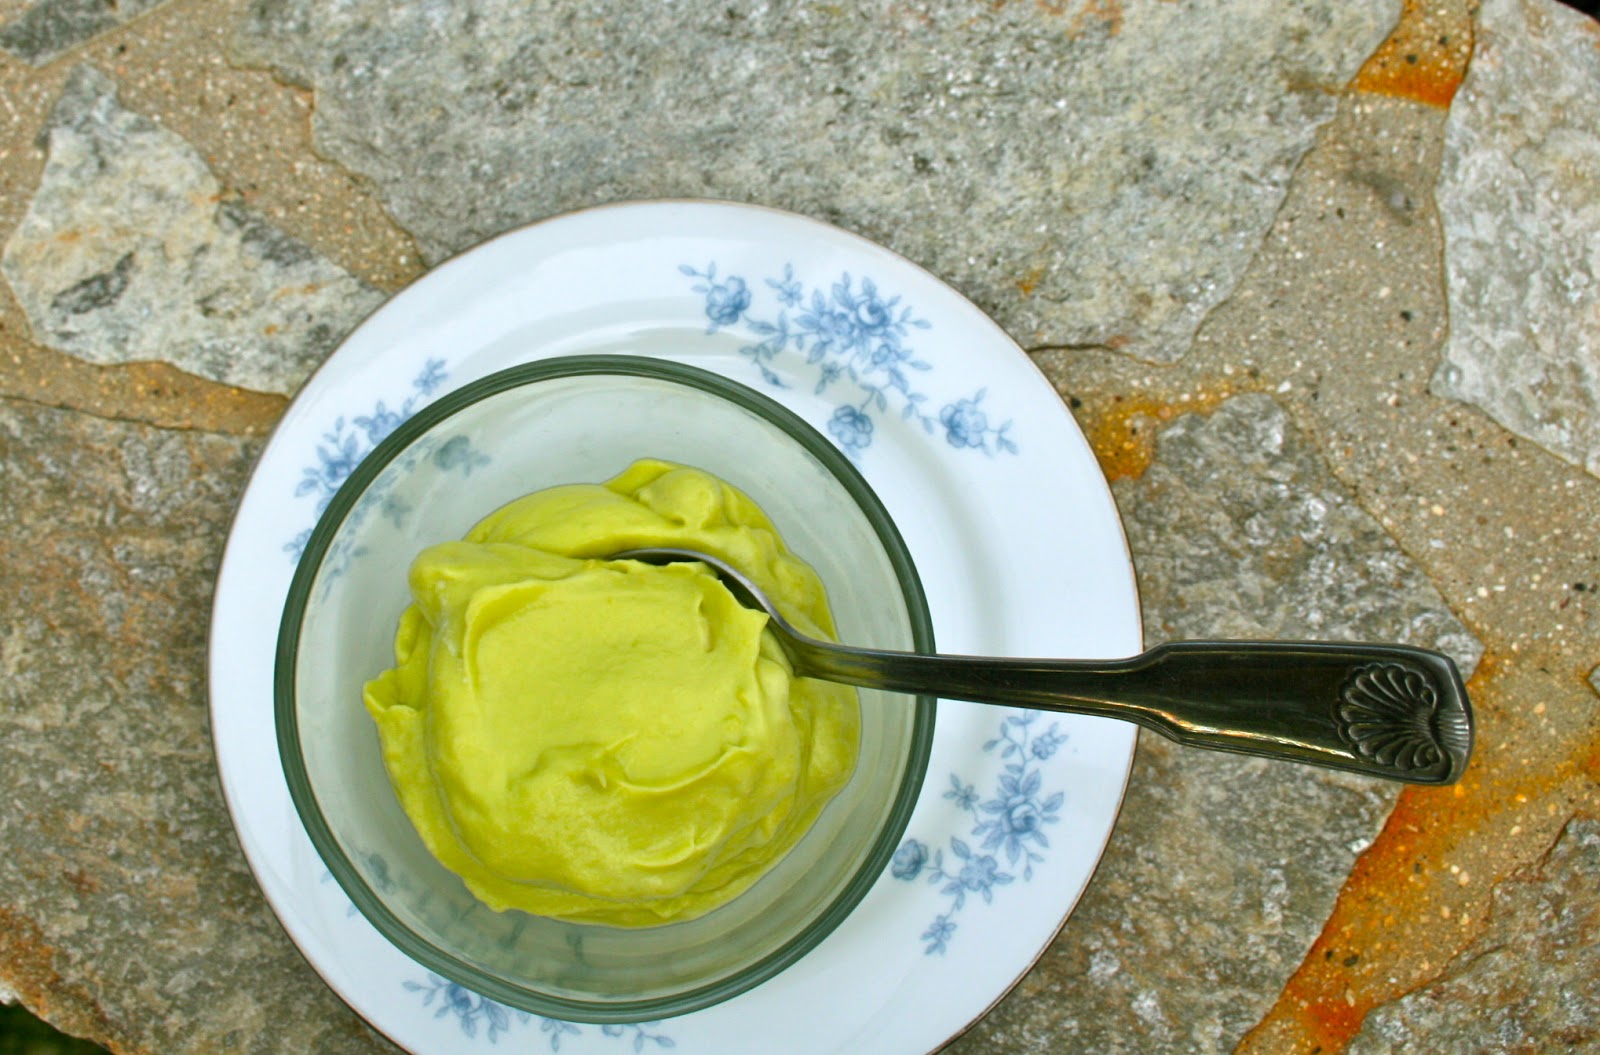
Vegan Avocado Ice Cream


What if I told you this ice cream was vegan?


What if I told you this can be made without an ice cream maker?

It's creamy and simple and pretty darn healthy for a dessert. Oh, and if you make it with Maui sugar, it makes a nice little Sustainable Sunday treat. Would you run off and make some? Let's do it!

Avocado Ice Cream
serves 3-4

2 very ripe avocados
1/4 cup sugar  or agave syrup
2 TBL lemon juice

Chocolate sauce:
1 part cocoa powder
1 part agave syrup

Cut avocados into chunks and toss with lemon juice. Place in a freezer safe container, taking care to spread the chunks out some so they don't freeze in one large block.

Once avocado is frozen, place in a blender or food processor with sugar or agave and blend until smooth. Taste and adjust sweetness or add more lemon juice if desired.

To make chocolate sauce, mix cocoa and agave together in a small bowl.

Serve immediately topped with chocolate sauce. Enjoy!


Monday, November 5, 2012

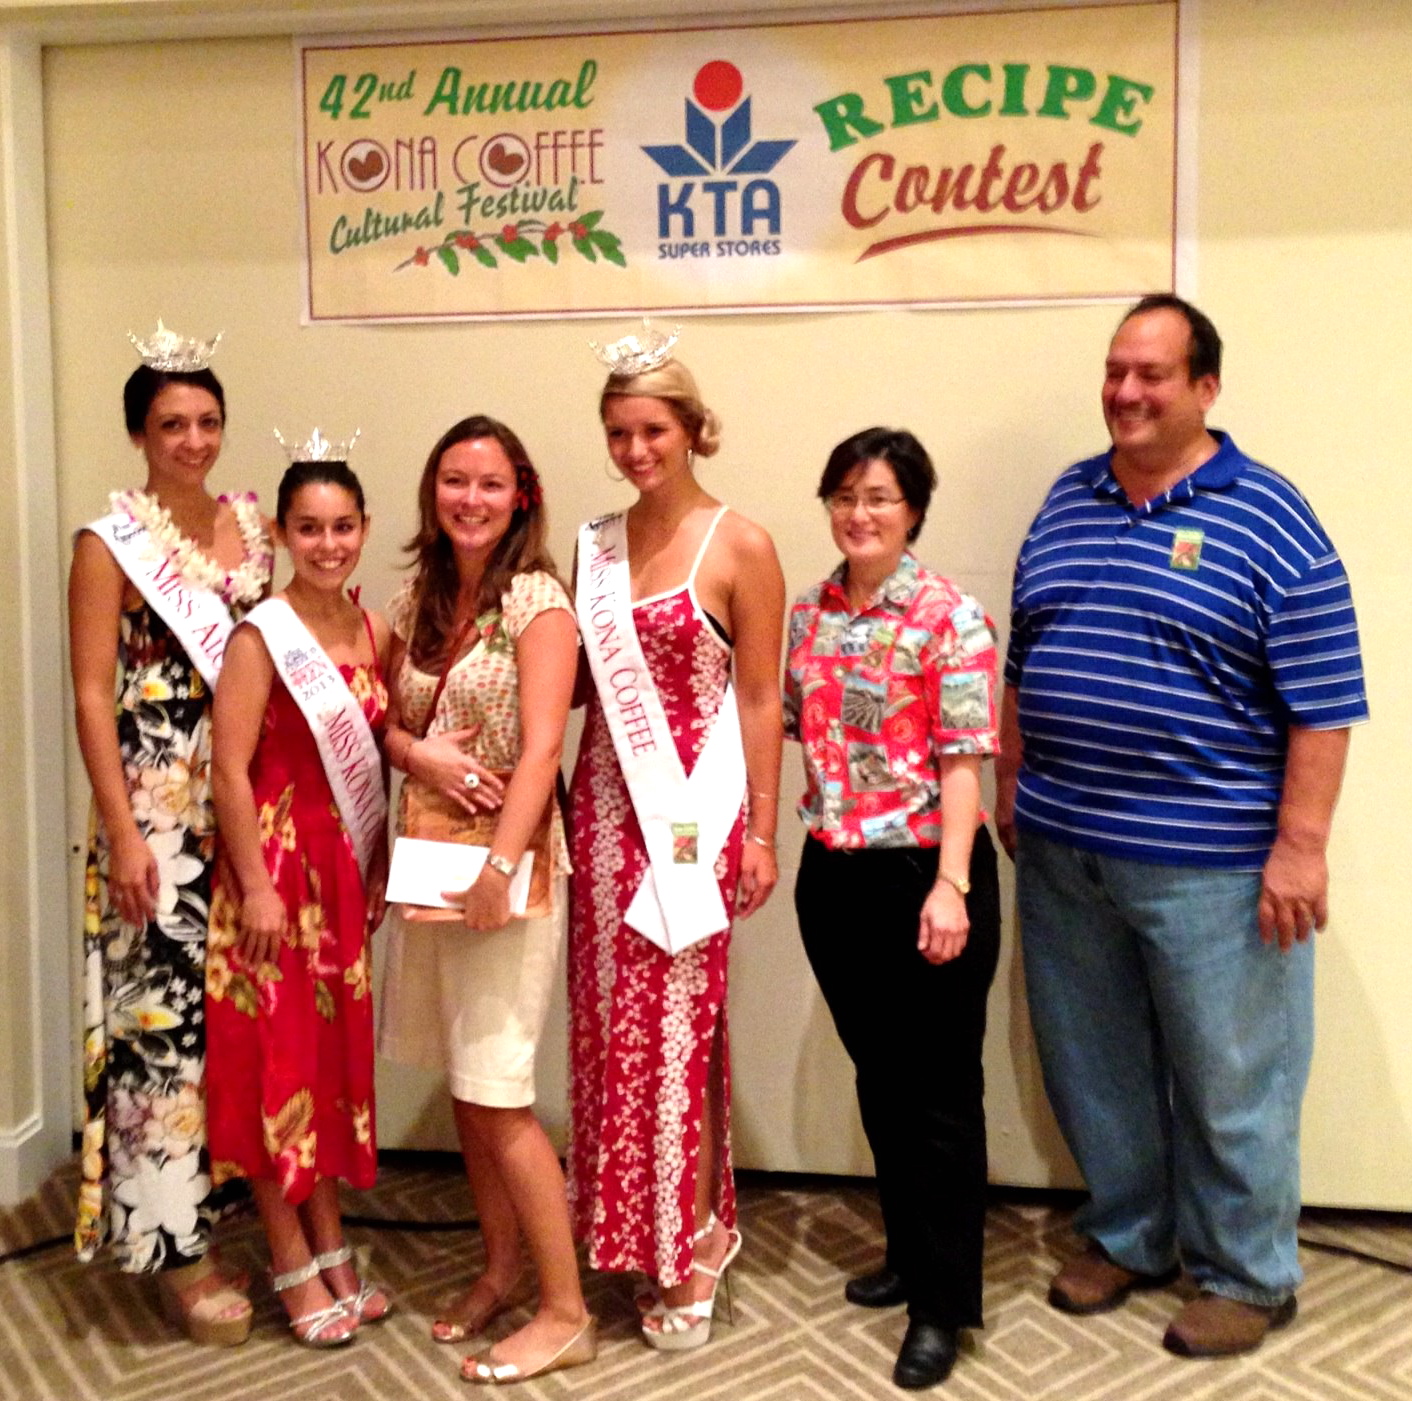
1st Place in Kona Coffee Recipe Contest


The Big Island's most important recipe contest of the year was held on Sunday at the Sheraton Kona Resort. The Kona Coffee Recipe Contest, sponsored by KTA and Kamehameha Schools, included dessert and entree divisions divided in professional, amateur, and culinary student categories.

My display table. We went with a "candy shop" theme

I entered the amateur dessert division with my Kona Coffee Brigadeiro recipe and won first place!

Posing with Kona coffee royalty

Let me tell you, the competition was fierce. On either side of me were contestants that had entered for many years and knew all the tricks of the trade. We chatted as we set up our display tables and the intimidation factor grew quite high for me, as this was my first go at this particular contest.


I was so surprised, happy and grateful to have won. Those little brigadeiros (a Brazilian fudgy candy) look humble, but pack a mighty flavor punch. The display turned out pretty cute too, thanks to my helper Rosanne. Thanks also to Renee for cheering me on, and to Ciara and Brendan for bringing me a sandwich when I forgot to eat the entire day. Please see the winning recipe below and don't forget to drink 100% Kona coffee!

My lucky coffee cup ring

The Kona Coffee Festival continues until November 11 with loads of fun activities including a parade, coffee cupping contest, a concert, and much more. See you there.

Kona coffee brigadeiros

Kona Coffee Brigadeiros
A twist on a Brazilian fudgy candy
Makes about 3 dozen

1 cup sweetened condensed milk
½ cup espresso or very strong Kona coffee
2 TBL butter
2 tsp light corn syrup
½ cup cocoa powder
36 Kona coffee beans

In a medium saucepan combine condensed milk, coffee, butter and corn syrup over medium-high heat stirring constantly with a wooden spoon. Once the mixture begins to boil, turn the heat down to medium-low and continue to stir for 15-25 minutes or until the mixture thickens, like fudge.

Pour the mixture into a bowl without scraping the sides of the pan, discard what remains in the pan. Allow the mixture to cool in the fridge for 3-4 hours. 

Using a teaspoon, scoop the mixture and roll into balls with butter-coated hands. Dip into cocoa powder to coat and press a coffee bean on top. Enjoy!

You should know that it took me 4 attempts to get the technique for this recipe right. Don't get impatient when you are cooking the batter, it needs to be pretty thick or else it won't hold together. I just don't want anyone to get the idea that this is an easy recipe, it's not! But it is certainly delish and was worth all previous failures. 


Thursday, August 30, 2012

Pineapple Upside Down Cake


I've been wanting to do a series on throwback recipes for awhile, and I'd say this pineapple upside down cake is the perfect way to start things off.

Growing up, dear old Betty Crocker was our go-to cookbook. Mom and I would flip through the flour-coated pages, oggling the perfect pastel petit fours and eloquently frosted layer cakes. But you see, mom and me, we're just not petit four kind of gals. Precision is not our forte. While we'd love to make the most beautiful of all pastries and have the family ooh and ahh, at the end of the day, we just can't be bothered. It's not a lack of patience, but rather a simple case of priorities. We want to make something delicious that doesn't take all damn day.


My memories of pineapple upside down cake involve a gooey, thin cake turned out from my father's well-seasoned cast iron skillet. Looking back, I'm not sure how we accomplished this, my own skillet today is so heavy I can't pick it up with one hand, so I made mine in a pie pan. Either way, this is a glorious cake, with lots of vintage flair. This was my husband's first time eating it, and the way he gushed was just the cutest thing. It was the first time in my life when I could say, "oh that old recipe? Why, I only make that when I don't care how it looks."


Pineapple Upside Down Cake
from Betty Crocker's Cookbook
Serves 8

Cake:
1 1/4 cup flour
1 cup sugar
1 1/2 tsp baking powder
1/2 tsp salt
1/4 milk
1/3 cup butter or shortening
1 egg
1 tsp vanilla

Topping:
1/4 cup butter
1/2 cup packed brown sugar
1 can drained pineapple, or 5 slices fresh
7 maraschino cherries (optional)

Preheat oven to 350. Melt butter (for topping) over low heat in a cake pan, pie pan, or skillet. Be sure the butter coats the entire pan. Sprinkle brown sugar evenly over butter in the bottom of the pan only. Place a pineapple slice in center of pan. Cut remaining slices in half and arrange around center slice. Place cherries in "holes" if desired.

To prepare the batter for the cake, measure all ingredients into a large bowl. Blend 30 seconds on low, scraping bowl constantly. Beat on high for 3 minutes, scraping occasionally. Pour into pan on top of arranged pineapples.

Bake for 35-40 minutes or until a toothpick inserted in the center comes out clean. Invert onto a plate, leaving the pan over the cake for a few minutes. Serve warm. Enjoy!


ShareThis

Related Posts Plugin for WordPress, Blogger...